Material, processes & technical skills in art & design


Aperture ring = depth of field = amount of light which comes into the lens. A lens is like an eye.
Shutter Speed


ISO
ISO


Movie-Record Button
Shutter-Release Button
Exposure Compensation Button / Aperture Button
Information (Info) Button
Live View Switch
Mode Dial
Command Dial

VR Control
Auto/Manual Focus
Focal Length (Zoom Lens)


-Darkroom-
Film/Development Process
How to develop film? – There are exactly five stages to the process of developing a film and the first four have to take place in the dark room, the film should always be kept in the dark otherwise the film will fog and the images will disappear due to the sensitivity of light.
For the roll film such as 35mm and the 120-medium format size, a developing tank would be used, it consists of a light tight drum or container, usually stainless steel or plastic and a ‘spiral’ which the film is placed onto and its made of the same material as the tank.
The steps for developing a film
To begin the process of developing the film you’ll need to un-ravel the film just a little bit to have enough room to cut off the edges of the film so it can slide onto the spiral easily, you would then place the film securely onto the spiral before entering the darkroom so your able to get a good enough grip of it to be able to twirl it on.
Once you’re in the confined darkroom you’ll then begin twisting the film round the spiral using a two and fro method to prevent ripping of the film, once you’ve reached the end of the film, you will carefully use your fingers to cut the film container off the end and completing the ravel, you would then put the tanks tube through the spiral so it reaches the flat end and sits firmly on it and then you would place it into the drum/container, after placing it into the drum you would then grab the funnel and clip it tightly in the drum so you can add the chemicals necessary to develop the film, the lid would then be placed on top once leaving the darkroom.
The next stage involves the development of the film, you will need to pour 150ml of developer and 150 ml of water into a flask with the temperature at 20 degrees, if too cold place under a hot tap or if too hot place under a cold tap until temperature reaches the 20 degrees mark, once done pour into the drum and making sure lid is firmly closed to prevent spillage, you would then rotate the drum for 1 minute then release the air, you would begin rotating for another 30 seconds and release the air again and repeating this process for up to 6 and a half minutes, you would pour the developer away and then you would add 300 ml of stop, you would rotate the drum again after placing the lid back on for another 1 minute and releasing the air and stopping for 30 seconds and repeating until 2 minutes, you would pour the stop away and add 300ml of fix, rotate for 1 minute and repeat the pressure release for up to 4 minutes, you would then take the spiral and funnel out of the drum and place the spiral in to cold water to wash the film from the chemicals for 10 minutes, after the 10 minutes has been done you can then place them into a drying cylinder until all water has evaporated.


Darkroom Printing
The Enlarger - Set up
The way you set up an Enlarger is to make sure each piece is correctly placed.
- you must first insert either a 50mm or 80mm lens depending on the image into the Enlarger which is just beneath the film, you slot it in, holding it tightly in place making sure the little yellow circle is facing right, you must then tighten it using a little bar which is pushed through a hole to secure the lens in place, once you have done that you then proceed onto the film carrier which is slotted in just above the lens, you just have the two ridges facing outwards and you must have the gap where the film carrier goes widened, which is done by using a little switch on the side of the enlarger head, once you have placed the film carrier into its specific area you must then close the gap between the light and the film carrier to stop the light exposing out of the sides.

Contact Sheet


To achieve a contact strip you must make sure your negatives are clean and dry after the process of developing them, if so you must then cut them into sections of 6, once you are in the darkroom and the room is clear of any white light then you must take out your photographic paper and place it underneath the negatives so the light passes through the negatives onto the paper, you must have the emulsion side up - sticky -, once you have achieved that shine the light every 2 seconds uncovering a section of the negatives at a time, you then proceed to develop them and consider which is the best and most visible, you would then continue to do that process but with the time which best suited it, and by the end of the process you will have your first contact sheet.
The reason we produce a contact sheet is so it enables us to get a better view of our photographs and what the potential outcome of the image will be, we are also to show the mistakes we have done i.e over exposure.
The combined Image - Sandwich Negative - process
What is sandwich negative?
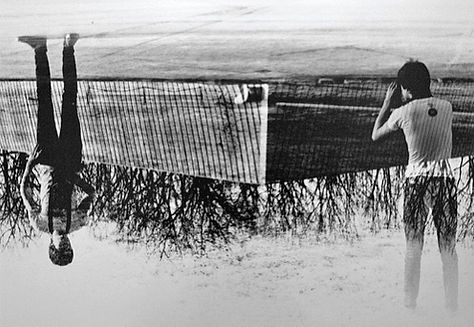
Sandwich negative is combing two negatives into one image, to create this effect you must place two negatives into the film carrier and then placed in the enlarger, you would then process the same as if it was just a single negative however in areas which your negatives are bright details will be held back from the other negative whereas if the negatives are dark details from the other negative will pass through it, once you sandwich the two negatives together it was cause the image to be much more denser which concludes in the exposure time being much longer than if it was a single negative.
The reason we create photographs with combining images because it gives more illustration behind the meaning of the photograph, it tells a more in depth story and represents the visuals more clearly.
Examples
My Examples
Pin Hole Camera Technique
To be able to produce a photograph using the "Pin hole camera technique" you need to first create the camera and by doing so you will need 6 tools:
Sticky tape/glue
Black paint or black paper
Aluminium foil
Scissors/knife
Pin/small needle
A cardboard box which has a lid or opens at one end or even a tin with a removable lid, the size of the cardboard box or tin doesn't matter however it should not be bigger than a size of a shoe box.
To start the creation of the camera you need to line the box/tin with black paint or matt paper inside to stop any light bouncing off and to make the objects inside as dark as possible, this will stop the photograph from going wrong.
You will then cut a small neat hole in one end or even the side of the object after doing so you would apply glue or sticky tape to fix a flat piece of aluminium foil over the existing hole, it should be tight and secure.
If you've cut the top of a tin open you will have to create a lid which is tight fitting around the edge of the tin, to help tighten the lid if it is loose you will find helpful either a black cloth, velcro strips or black sticky tape can be helped to fasten the lid down, you will need to check to see if the lid can be closed and re-opened several times to ensure the lid is securely placed but cane easily removed.
Once you have created the lid you will then proceed to using either a pin/needle to create a small but neat pin hole in the centre of the aluminium foil, this will be to ensure the light can travel through to create the photograph.
You would now go into a dark room with no light exposure so you can place your photographic paper into the tin/cardboard box however for this to sucsessfully work you must place the photographic paper away from where you made the hole in the tin/box, now you can cover the hole with some black, thick tape to ensure it has no gaps to prevent light exposure and ruining the photographic paper and you would place your light - tight lid on top.
Your camera is now complete, you would go and find a specific location you wish to photograph, and place the pin hole directly in front of that subject so it can capture it on the photographic paper, you would have to test quite a few times to be able to get the right timing and exposure.
Examples
Pin hole photography is such an amazing technique because tyou don't need a memory card or to worry about which lens you want to use, its about sitting back and watching the world be absorbed into paper.
My examples
My photographs aren't as good as these which have been provided, its something ive got to get the hang off, its not an easy process and takes a lot of patience.
Iphone capture
An iphone capture is where you take a photograph from your phone and produce a photograph onto photographic paper using the iPhones/phones own light source.
Instead of placing a film masking frame into the enlarger you would replace it using your phone, however you would make sure your photograph was on the screen and in a visible area so it gets all aspects of the photograph in it, you would either use a 50mm lens or a 80mm lens depending on how dense or visible the photograph is, you would make sure the phone does not auto - lock, so once your producing the image the light of the image doesn't disappear and disrupted your work.
The process of the iphone capture is exactly like processing a negative, you would focus the image just the same way you would a negative and you wouldn't need a timer, just the red filter to stop the light from passing onto the paper.
The type of image which would be produced would be a paper negative because the original phone image is already a positive, to produce a positive image you would have to lay a blank piece of photographic paper underneath the paper negative so it transforms back into a positive, you would shine a white light over the image for a certain time and you would need to do this process until you get the right contrasts/saturations which you like.
My examples
Projection Photography
Projection photography is about projecting an image either onto a surface or a person to create a unique and fascinating piece of photography, projection photography isn't an easy process, you have to have the right image to project otherwise it looks very pixelated and would produce a very poor photograph.
Using a projector opens up a wide range of possibilities within the photography industry, your able to explore more diverse images and change conceptions or visual meanings behind certain imagery and create something so eye-catching and unique. an image can completely change the concept of the concept so if you was put a photograph over a portrait it would change the whole demeanour of that portrait itself.
Using a projector isn't good for up close shots or enlarging an image which would easily pixelate, it would produce squares across your image, ruining the photograph itself so you've always got to be careful on what image you are trying to put onto an object/person.
Examples
My examples